Using a DigitaLIZA or DigitaLIZA 110 to Scan Super 8 Film
2 8 Share TweetIn this tutorial, I’ll explain how and why you can use a super 8 camera to take 3,600 individual photos and scan them using a Lomography DigitaLIZA or Lomography DigitaLIZA 110.

As a Lomographer who’s also into filmmaking, my preferred format for making short films is the super lo-fi, super 8mm format. The tiny frame size gives a soft retro, image that is similar to the 110 format in graininess, but even more so. It’s a format that screams “vintage” like no other film format can.
While editing my latest 8mm short film, I hit upon an idea.
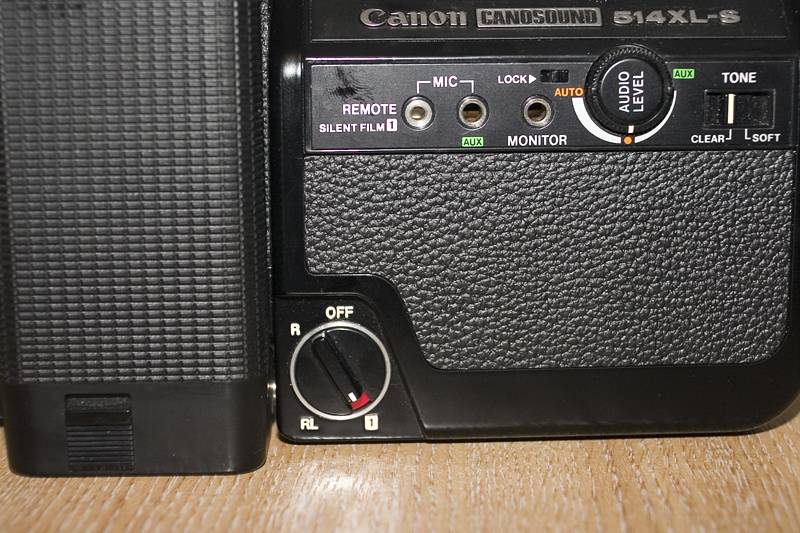
The super 8 camera I use is a Canon 514 XLS. It has a setting called “1” which, rather than constant filming at 18 or 24 frames per second, takes just a single photo. This function was originally added so super 8 filmmakers could do stop motion animation, but there’s no reason you can’t use it to take photos like you would on a stills camera.
The cool thing about using a super 8 cine camera to take stills is the sheer length of the film. At around 15 meters long, each roll gives 3,600 frames! Imagine taking your super 8 camera on a road trip. You just load it up once and you snap constantly without worrying that you’re ever going to run out of film.
It also opens up the possibility for some interesting projects like time lapses, or “1,000 strangers” type projects (well, 3,600 strangers, anyway!) You’d definitely need to push your creativity in using up all that film. Aside from color negative and black and white films available from Kodak, there is also various color slide films available for super 8mm, so cross processing is possible too.
There are a few things you need to remember when shooting super 8mm as a stills format.
First thing is to make sure your camera actually has a single shot function.
On most Canon super 8 cameras (like my Canon 514), there is a dial with a “1” setting. Braun Nizo cameras typically need a separate shutter release cable for shooting single frames. Check before you acquire your camera.
The second thing you need to be careful about is loading and unloading the cartridges.
When you open a roll of super 8mm film, you can see the very start of the film is poking out of the cartridge and exposed to light. Those few frames at the beginning are no good, so you’ll need to run the camera on for a few seconds in cine mode to get to the unexposed part of the film.
When you remove the cartridge from the camera you also get the same problem. Several frames at the end of the roll will get exposed to light and ruined (we’re not talking cool light leaks here, we’re talking total overexposure).
Okay, so you’ve shot your super 8 roll as a very long series of photos, how do you get those photos onto your computer?
Traditionally, filmmakers get film converted to digital by a process called telecine. This is a lab process that converts your super 8mm roll to a video file for editing in a non-linear editor like Final Cut or Windows Movie Maker.
Video files are essential for editing, but really impractical for a long series of stills.
- You need a decent editing program in order to be able to step through the frames one by one.
- Your video file is going to be running at 24 or 25 frames per second. The lab technician who converted your film to video would probably have projected it at 18 frames per second. This mismatch means that some frames are going to blend into each other on video and be impossible to grab as stills.
- Video compression is quite harsh compared to image compression. So, you should get better quality by scanning the film yourself.
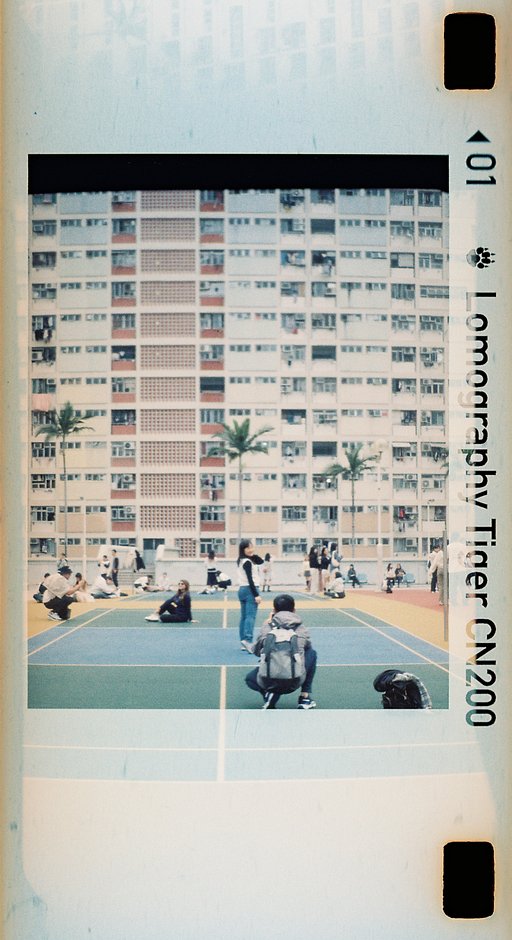
- Cost. A high definition telecine from a lab local to me runs at around 70 GBP per roll. For filmmaking I don’t mind standard definition (around 700×500 pixels) but for stills I would want something bigger. If you scan yourself using a DigitaLIZA or DigitaLIZA 110, you pay once for the scanning mask and you can scan as much as you like, however you like (For example, you can scan all the way out to the sprocket holes).
How to scan using the DigitaLIZA or DigitaLIZA 110.
- Place your DigitaLIZA or DigitaLIZA 110 on a table with the metal plate lined up beneath it.

- Take your developed roll of super 8mm and wind out several feet until you get to the first images you shot. If you look at both sides of the film, you will see that one side is shiny and one is matte. You will want to place the film shiny side down.
- Feed the film into the DigitaLIZA from right to left. The DigitaLIZA works by locking into the edges of the film and holding it in place. Because super 8mm film is exposed right up to the edge of one side, you need to have the sprocket side on the side that is gripped by the DigitaLIZA (otherwise the scanner won’t be able to see your whole image).
If you’re feeding from right to left and shiny side down, then the sprockets should be next to the edge of the DigitaLIZA anyway, so you can’t go wrong.

- Carefully place the magnetic top part of the DigitaLIZA in place. This is the tricky part as the mask is much wider than the film, so the film tends to want to slip out of position. So take it slow.

- Close the DigitaLIZA lid and lock the film into place.
- Remove the magnetic top and metal bottom plate and you should have a strip of film that is held perfectly in place down one side of the DigitaLIZA. If you film isn’t all locked into place or one side is sagging, you need to open up the DigitaLIZA and try again.

- Place the DigitaLIZA in your scanner and start scanning!
And a few final tips -
- I would recommend scanning at least 3600 dpi. The 8mm images are tiny and need all the resolution they can get.
- A lot of the Canon super 8 cameras have a very slow shutter speed (around 1/30 second). This is great if you’re shooting handheld and want dreamy images with lots of motion. If you want something a little sharper though, then you need to lock down the camera on a tripod or brace against something when shooting.
- Super 8 film runs top to bottom, not side to side like 35mm or 110 film. If you’re shooting something in sequence to create a collage (for example), then you will end up with images that are very thin and very tall.
written by intensepuppy on 2013-03-14 #gear #tutorials #tutorial #sprockets #scanning #tipster #8mm #digitaliza


2 Comments