Can I Put 220 Film in a Holga?
5 26 Share TweetWill a roll of 220 film fit into your Holga? Do you have to make any special modifications to use it? I found the answers by reading articles online, but more importantly, through trial and error.

A co-worker was browsing through my images online, and saw how much I love experimenting with different films and techniques. The next time we worked together, he brought me a few different rolls of expired film from his freezer: including a 220 format roll of Fuji Astia 100. I was very grateful, but confused: I thought you could only fit 120 film in a Holga, or mod it for 35mm? He informed me that 220 will fit — but to be careful about the back film count window!
220 film is almost exactly the same as 120 film, but there are two important differences:
(1) It’s twice as long.
(2) It has no backing paper.
Think about characteristic #2 for a moment, and you’ll understand why he mentioned covering up the back of the camera: that little red window will let light leak directly onto the film! (Maybe that’s your style, though).
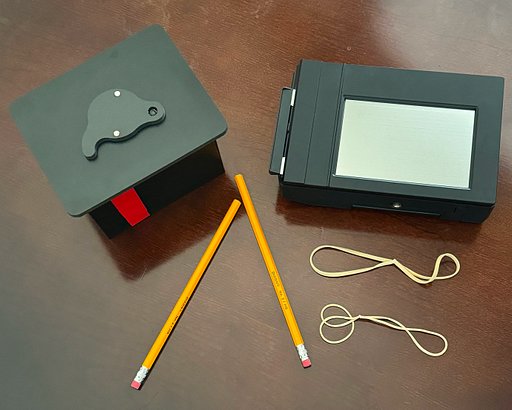
I took care of the back by taping a thin piece of cardboard over the count window. I also sealed the edges of the camera with blue art tape — I always do this when using my Holga to minimize light leaks (a few here and there never hurt anyone)… but I was extra nervous because of the lack of backing paper.
So now that your film counter is completely covered… how do you know where the frames start and stop — or even where the film starts and stops all together? This, my friends, is the unpredictability of Holgas at its best. To get some sort of clue where to start, I based my clicks on a chart I found that was actually developed for 35mm mods, but the same principles apply here.
Two thoughts were running through my mind: maybe I should turn the dial more, just to be safe, since I have so much extra film to work with. But aren’t accidental overlapping exposures pretty rad, anyway? I couldn’t decide… so I tried a little bit of everything.

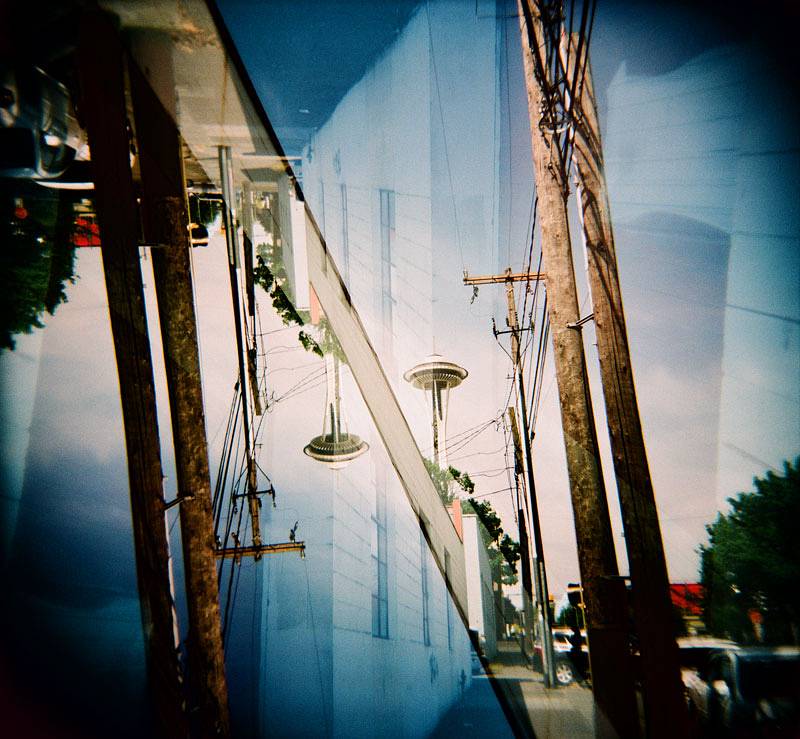
Silly me forgot one major thing: there’s a long strip of paper before the film actually starts – so you’re gonna need to start with more turns than the 35mm mod chart suggests. Someone on a forum suggested winding the film in the camera until you see the begin line [before sealing up the back] – this will expose your first frame a bit, but that’s pretty cool, right? Speaking of light leaks, I got the craziest gradations around one of my first frames. Or like my sixth frame, because I was shooting on the paper for awhile.

As I shot the roll, the tension seemed to be getting tighter and tighter (I have an older model and I always shove cardboard under the take-up spool so that it doesn’t get loose). I eventually gave up on my hurting fingers from turning the wheel and declared “I must have shot all of the film!” I was right, except… my last handful of frames all ran over each other! Another happy Holga accident.


Am I going to go out and buy more rolls of 220 film to get more shots out of my Holga ? Probably not, as it’s a little extra work trying to keep track of turns and shots. Would I use a free 220 roll if I got another one? In a heartbeat!
Note: this roll was cross-processed in C-41 chemistry. None of the colors have been adjusted during or after scanning.
written by katherine-lynn on 2011-07-06 #gear #tutorials #film #tipster #220 #lomography #holga #quickie-tipster


5 Comments