DIY Lightbox
17 45 Share TweetHow to build a homemade lightbox for scanning your negatives
We are going to tell you our experience building our own home made lightbox.
All began when we tried to scan our “360º Spinner” negative film and realized we couldn’t do it because of our old scanner scanning dims. We liked some of the ideas left by other Lomo-friends (like “rietveltt”) but we wanted to be more creative avoiding screen pixels.
Materials needed:
- Carton box (we’ve used one 40cms long, 25cms wide & 20cms high)
- A silver paper roll (the one used for cooking…)
- Light; we’ve chosen 2 fluorescent halogen lights (35cms long)
- 1 multiple socket adapter for unifying both light sockets in one
- Wire for attaching the lights to the box
- Greaseproof paper (size DIN-A3) as light diffuser
- Extras (duct tape for toping, scissors, glue stick & an awl)
- Patience & lots of eager!

How to proceed:
1st of all, we shall line all inside the box wit silver paper(the glue bar works well for this). Be careful to avoid wrinkles on paper; a ruler helps with this.
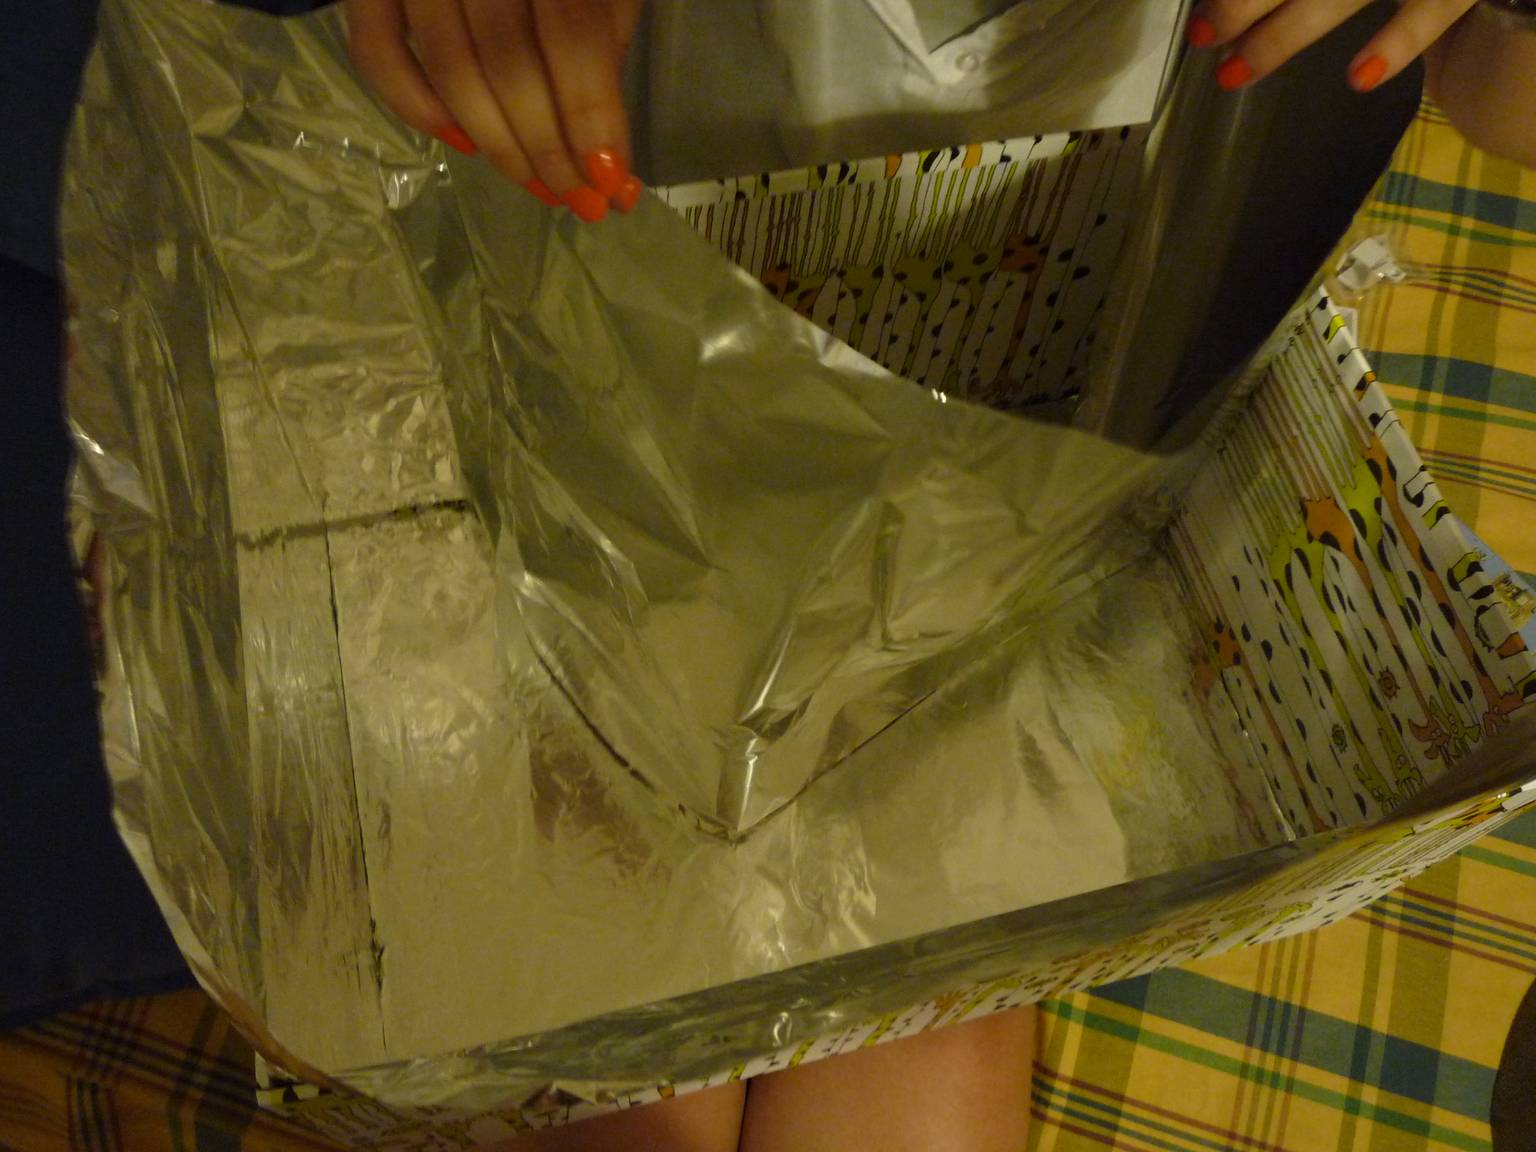

Top the upper part of the box with duct tape to avoid damage on paper.

Use the awl to make some holes on the box to pass the wire for fixing the lights to the box. We’ve decided to set them on the box side walls, so they aren’t too deep and so light is distributed in a better way. Remember, that if the light chosen has a switch, you shall leave it on. It will switch on/off when plugged.


We will do, as well, a small hole on one of the narrow sides to get light wires through.

To finish, just set greaseproof paper carefully on top (will work as light diffuser) with duct tape; don’t forget to tense it.

Box cover will protect the paper when housing.
Now just plug it and begin working with your negative film.


Hope it helps! :D!

written by pingus on 2010-12-08 #gear #tutorials #film #tutorial #tipster #negative-film #scanner #lightbox #handicraft #materials


17 Comments